
Introduction
Back in 2018, I was experimenting with Amazon Alexa's Skill developer tools. I remember how fascinating it felt to build experiences that responded to voice commands and displayed small "on demand" UI elements on devices like the Echo Show. It was a glimpse into what software could become when it stopped relying on static menus and started reacting to human intent.
Fast forward to today, and that idea has evolved into something much more powerful. The new OpenAI Apps SDK opens the door to a new generation of human-computer interfaces. Instead of forcing users through fixed dashboards or endless buttons, we can now create chat-like experiences that surface just the right interface when it's needed and disappear when it's not. This shift represents a fundamental change in how we think about apps. With OpenAI's Apps SDK, ChatGPT becomes a flexible development platform where language, logic, and user experience blend naturally together. Your app can show data, ask questions, or perform tasks directly within a conversation, creating a smoother, more human interaction.
In this guide, we'll explore how you can build your first OpenAI app using the Apps SDK, and why this moment may redefine how developers design the next generation of digital experiences.
Overview of the OpenAI Apps SDK
OpenAI didn't reinvent the wheel here. They base their so-called apps on the widely used Model Context Protocol (MCP). By extending this protocol through metadata properties, OpenAI enabled a way to bring interface intelligence into the game. MCP remains the core for invoking tools, passing context, validating schemas, and handling errors. The Apps SDK adds an additional layer of UI metadata and proper definitions and hints so that ChatGPT can render interactive elements (HTML) inline in conversation.
Existing MCP servers can still be utilized and therefore transformed to become OpenAI Apps by extending them with the needed metadata that enables the presentation layer. Based on that, ChatGPT can interactively and intelligently map and render fitting UI components.
The core elements you need are:
- The main server to bring the MCP protocol to life
- Tools, which define the capabilities of the MCP server and bring the logic and invocation definition to the client—in this case, ChatGPT
- Resources, which are "bundles" made available for defining relevant UI components that ChatGPT can render
- Widgets, which can be seen as the actual UI components
All these elements linked together enable you to create interactive experiences with the Apps SDK.
Setting Up Your Developer Environment
Since the OpenAI Apps SDK is based on the established MCP protocol, we can use the existing MCP tooling. You can choose between Python or JavaScript/TypeScript as your programming language. In this tutorial, we're going with TypeScript.
Before you begin, make sure you have npm or pnpm installed on your computer. Then run the following commands:
mkdir my-openai-app
cd my-openai-app
pnpm init
pnpm add @modelcontextprotocol/sdk zod
pnpm add --save-dev typescript tsx @types/node
Once that's done, you're good to go. Feel free to add your favorite TypeScript config in tsconfig.json. This is the config I'm using for this project:
{
  "compilerOptions": {
    "target": "ES2022",
    "module": "NodeNext",
    "moduleResolution": "NodeNext",
    "lib": ["ES2022"],
    "outDir": "./dist",
    "rootDir": "./src",
    "strict": true,    "esModuleInterop": true,
    "skipLibCheck": true,
    "forceConsistentCasingInFileNames": true,
    "resolveJsonModule": true,
    "allowSyntheticDefaultImports": true,
    "declaration": true,
    "declarationMap": true,
    "sourceMap": true
  },
  "include": ["src/**/*"],
  "exclude": ["node_modules", "dist"]
}
Building Your First OpenAI App
Now let's start with the actual logic of the application. Following the standards of the Model Context Protocol (MCP), we need a server with the corresponding /mcp endpoint. This server lists and exposes the tools that can be used by ChatGPT (or any other MCP client) to handle specific application tasks. To get it working, we need the following parts:
A server:
import { Server } from "@modelcontextprotocol/sdk/server/index.js";

const server = new Server(
{
    name: "my-openai-app",
    version: "0.1.0"
},{
    capabilities: {
    resources: {},
    tools: {}
    }
}
);
The list of tools:
const tools: Tool[] = [
  {
    name: "list_todos",
    title: "List Todos",
    description: "Returns a list of todos with an interactive visual dashboard",
    inputSchema: {
      type: "object",
      properties: {
        priority: {
          type: "string",
          enum: ["high", "medium", "low", "all"],
          description: "Filter by todo priority"
        },
        status: {
          type: "string",
          enum: ["pending", "in_progress", "completed", "all"],
          description: "Filter by todo status"
        }
      }
    },
  }
];
Widgets and resources that can be mapped to the tools through the _meta data property:
const resources: Resource[] = [
  {
    uri: "ui://widget/todo-dashboard.html",
    name: "Todo Dashboard Widget",
    description: "Interactive todo dashboard",
    mimeType: "text/html+skybridge",
    _meta: widgetMeta
  }
];

server.setRequestHandler(ListResourcesRequestSchema, async (_request: ListResourcesRequest) => ({
resources
}));

const widgetMeta = {
  "openai/outputTemplate": "ui://widget/todo-dashboard.html",
  "openai/toolInvocation/invoking": "Loading todo dashboard...",
  "openai/toolInvocation/invoked": "Dashboard loaded",
  "openai/widgetAccessible": true,
  "openai/resultCanProduceWidget": true
}

const tools: Tool[] = [
  {
    name: "list_todos",
    title: "List Todos",
    description: "Returns a list of todos with an interactive visual dashboard",    inputSchema: {
      type: "object",
      properties: {
        priority: {
          type: "string",
          enum: ["high", "medium", "low", "all"],
          description: "Filter by todo priority"
        },
        status: {
          type: "string",
          enum: ["pending", "in_progress", "completed", "all"],
          description: "Filter by todo status"
        }
      }
    },
    _meta: widgetMeta
  }
];
The UI elements can be built in many ways and must be made accessible to the app itself. You can use external resources hosted somewhere or generate them on demand in your MCP server. For more details, check out the official examples here.
The complete application from this tutorial can be found here.
Testing and Debugging Your App
Once that's all setup, you need to get your application running. For that, you can simply use pnpm dev to start the application locally. Depending on the local port (in this case 8000), we need to find a way to expose our local server to the web so that ChatGPT can utilize it. For that, a tool like ngrok can be used.
brew install ngrok
# register online for your authtoken
ngrok config add-authtoken <your-auth-token>
ngrok http 8000
This gives you a publicly accessible URL you can use in ChatGPT to test your MCP server.
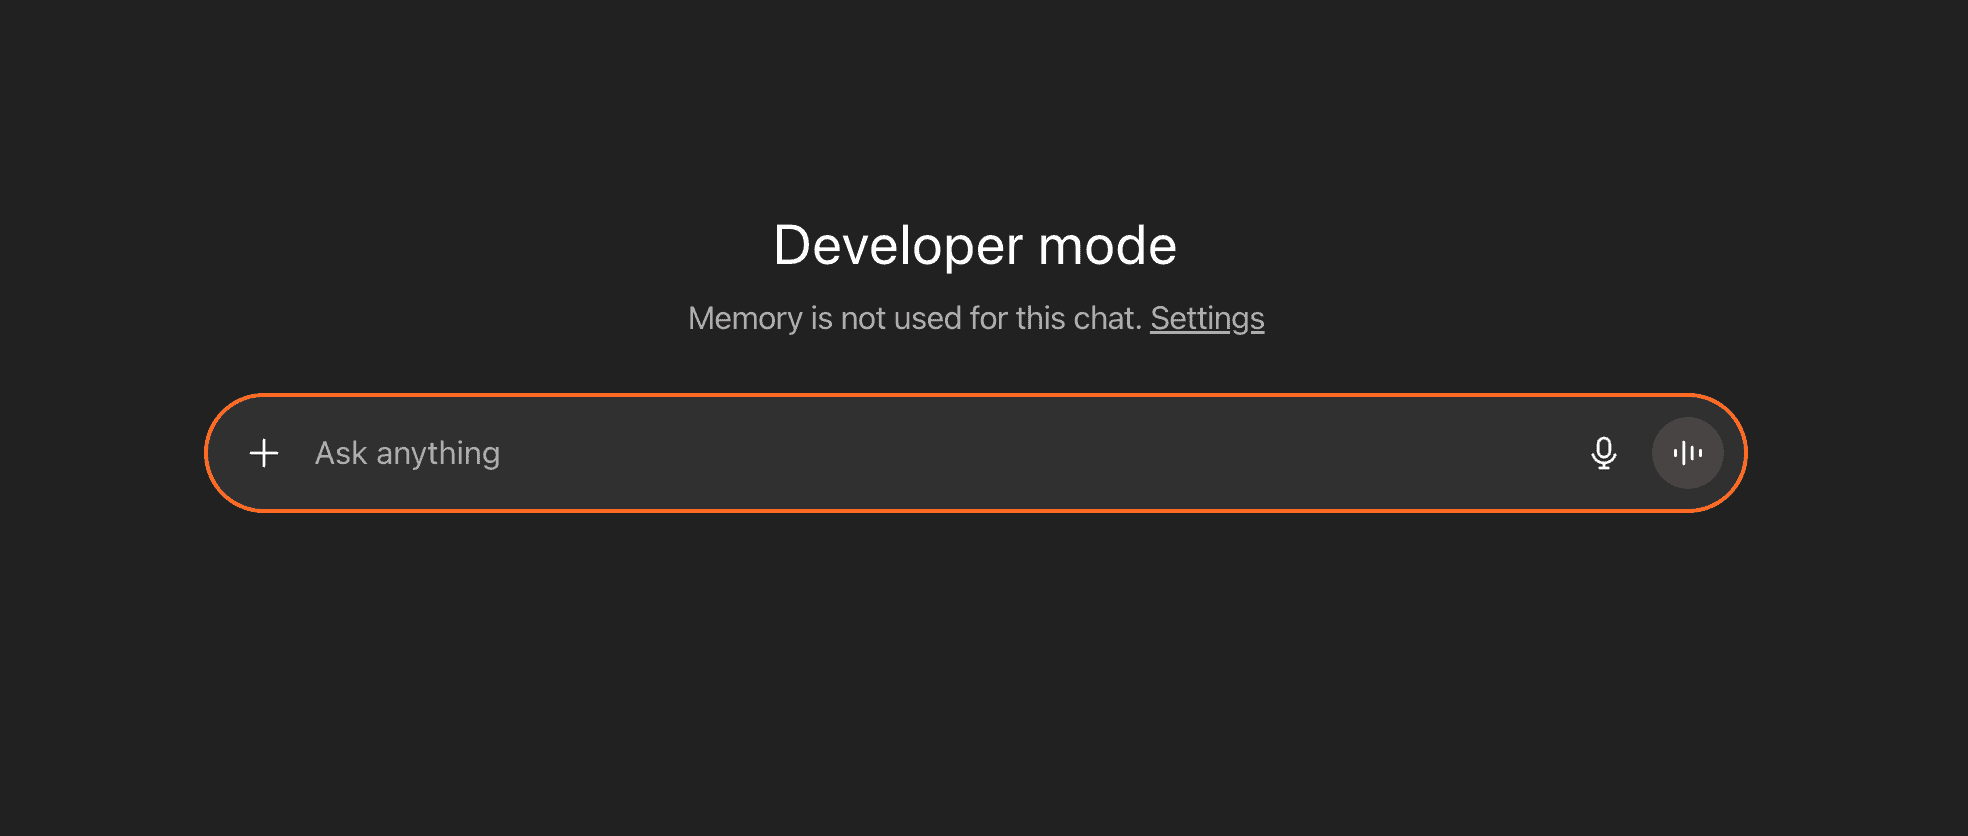
Now head over to ChatGPT and find the settings menu in the lower left corner. There, go to Apps & Connector and then Advanced and enable Developer Mode. Once that's done, your ChatGPT interface should look like this. Head back to the main Apps & Connectors view and create a new apps.
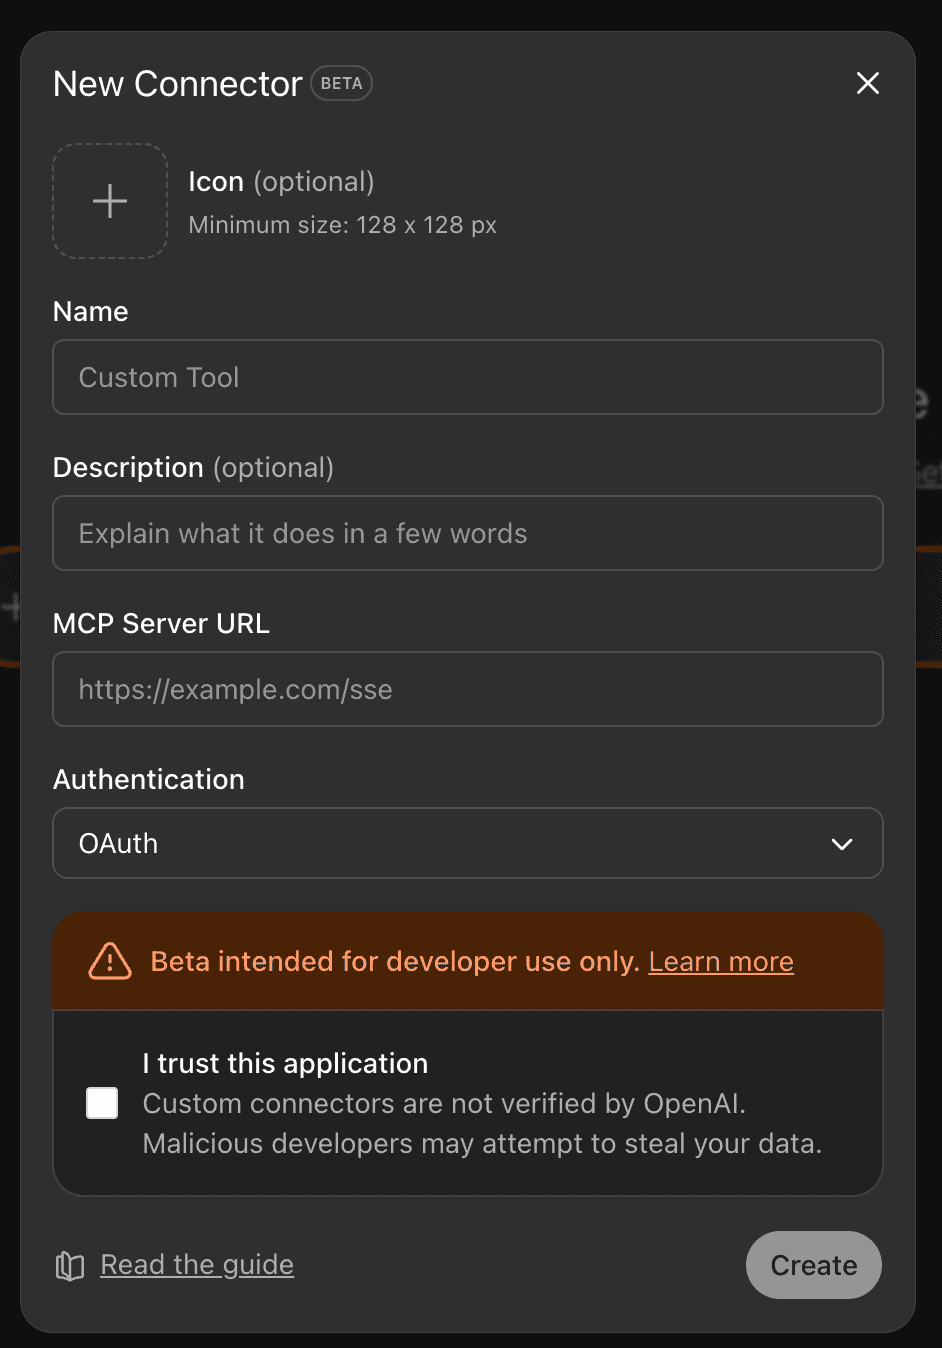
Fill in the required details and add the public ngrok URL + /mcp and select No Authentication for this simple example. For more advanced use cases, OAuth is required. You can read more about that here.
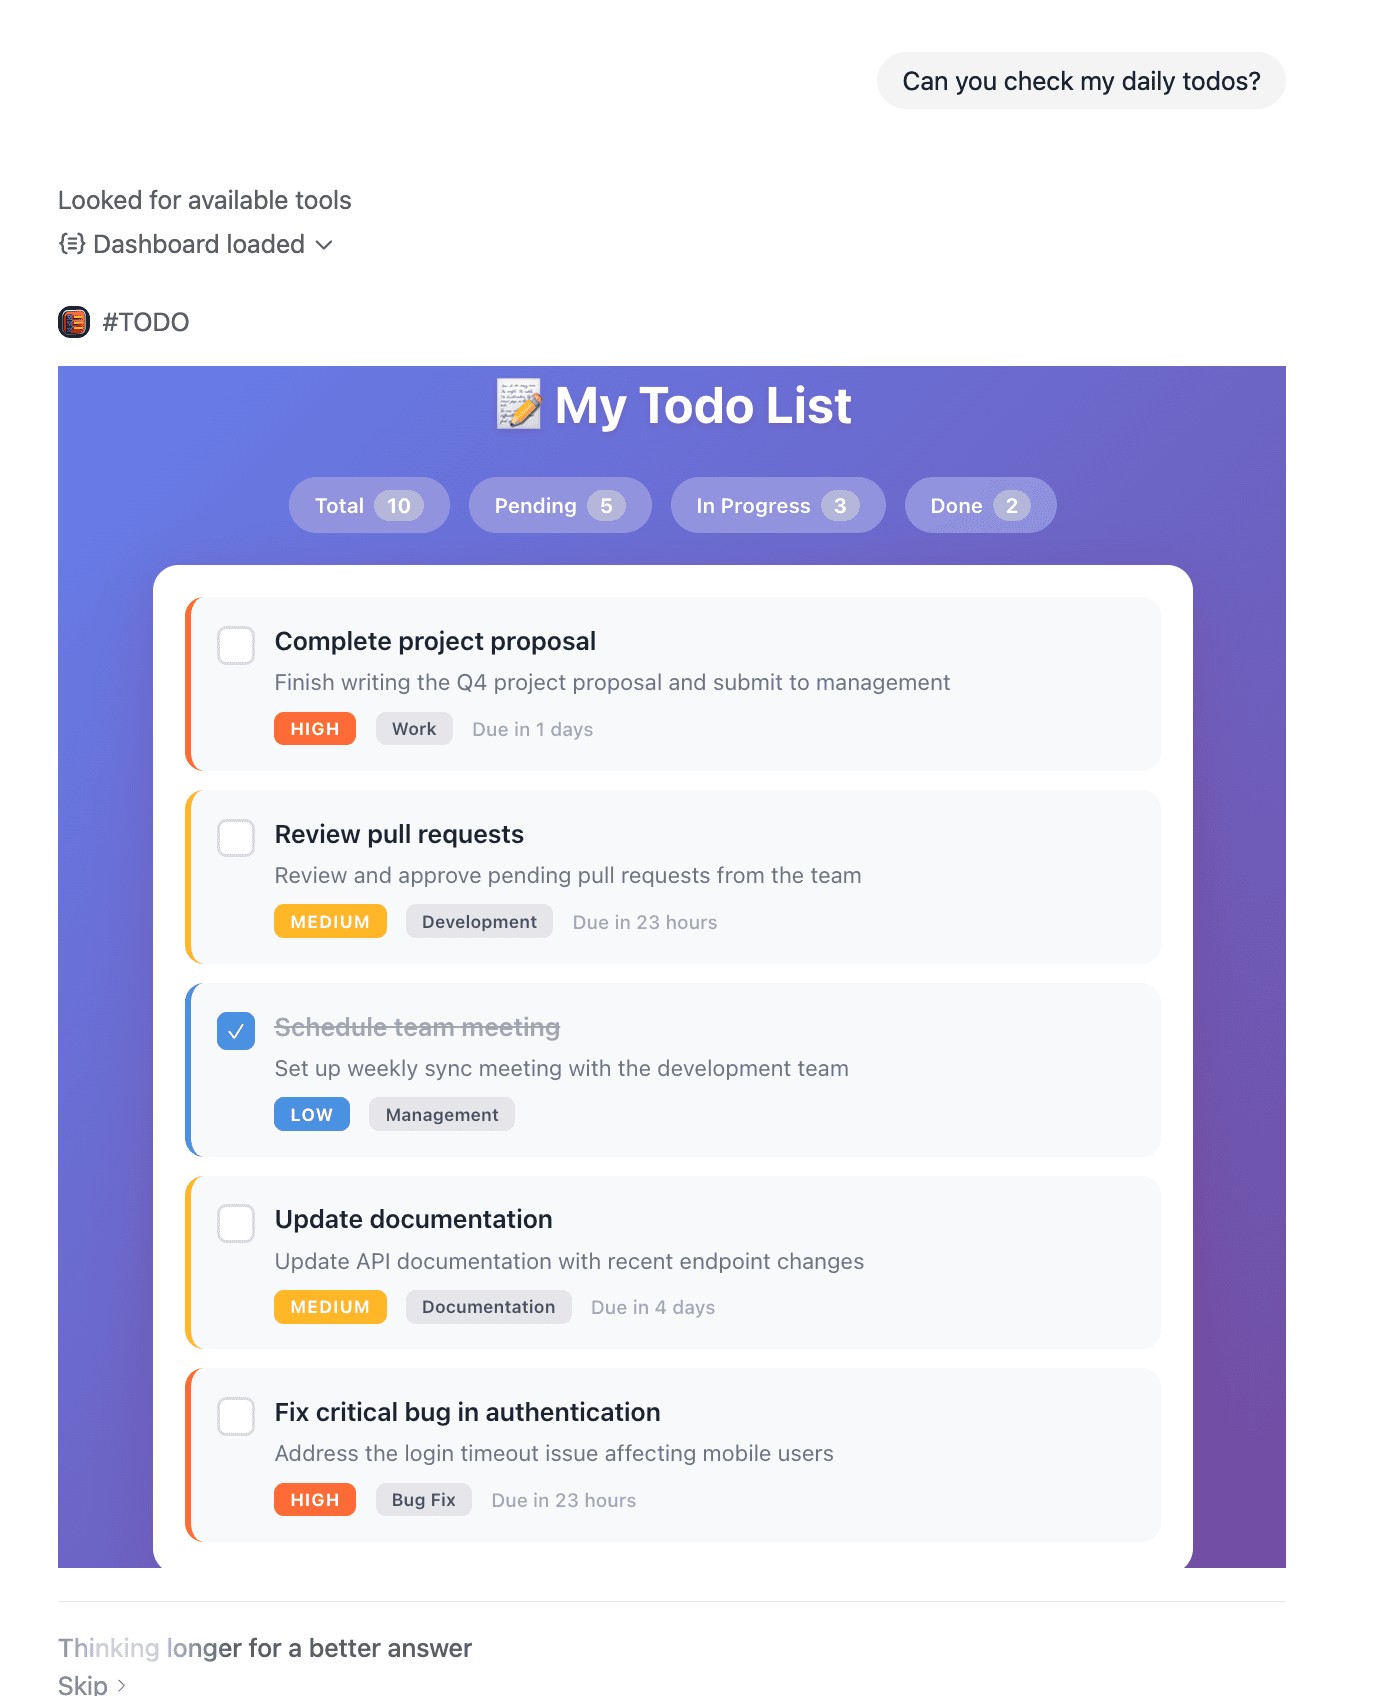
 Once that's loaded, you should see the tools in your Apps interface. Try it now by providing a prompt like:
"Hey ChatGPT, can you show me my todo list?"
And then you can see the magic happen.
Publishing and Sharing Your App
Currently, OpenAI's Apps platform is in its early access phase, which means direct public distribution isn't yet available to all developers. However, OpenAI has announced plans to launch an official App Store where developers will be able to publish their applications for the broader ChatGPT user base.
In the meantime, there are several ways you can share and deploy your app:
1. Private Deployment for Your Organization You can deploy your MCP server to a production environment (AWS, GCP, Azure, etc.) and configure it with OAuth authentication. This allows your team or clients to connect to your app securely through their ChatGPT interface.
2. Developer Testing and Feedback Share your ngrok or production URL with other developers who have Developer Mode enabled. This is perfect for gathering early feedback and iterating on your app's functionality and UI. 3. Open Source Distribution Consider publishing your source code on GitHub. The developer community is actively building and sharing OpenAI Apps, and open-sourcing your work can help others learn while potentially attracting contributors to your project.
4. Prepare for the App Store Launch Start building now so you're ready to publish when the App Store opens. Focus on:
- Polishing your user experience and error handling
- Implementing proper authentication and security measures
- Creating comprehensive documentation
- Building a portfolio of apps that showcase different use cases
Keep an eye on OpenAI's official announcements and the developer documentation for updates on the App Store timeline and submission guidelines.
Conclusion
The OpenAI Apps SDK represents a significant shift in how we build software interfaces. By combining natural language understanding with dynamic, context-aware UI components, we can create applications that feel less like traditional software and more like intelligent collaborators.
What makes this moment particularly exciting is that we're not just building new features - we're reimagining the fundamental interaction model between humans and computers. The conversational interface becomes the command line, and widgets appear exactly when needed, creating experiences that are both more powerful and more intuitive.
For developers, this is an opportunity to be early to a platform that could define the next decade of application development. The skills you build now - designing for conversational flows, creating adaptive interfaces, and thinking about context-driven UX - will become increasingly valuable as this paradigm grows. Whether you're building internal tools for your organization, creating productivity apps for end users, or experimenting with entirely new categories of software, the Apps SDK gives you the foundation to start building today.
Ready to build your own OpenAI app? At AVIMBU, we specialize in helping companies design and develop AI-native applications. If you're looking to bring your app idea to life or need guidance navigating this new platform, we'd love to help you build the future of human-computer interaction.
Now is the time to experiment, learn, and position yourself at the forefront of this transformation. The conversation-first interface isn't coming - it's already here.
References
Here are some interesting references this blog post is based on:
- Introducing Apps in ChatGPT
- Model Context Protocol - Getting Started
- OpenAI Apps SDK - MCP Server Concepts
- OpenAI Apps SDK Documentation
You can find the code of this tutorial here.